
If you read my last tutorial you know my sister in-law is getting
married and I was wanting to make some things that match their decor
they registered for their first place. The last tutorial was personalized wall art , today I am going to show you how to dress up a boring light switch cover to add a little pop to any room.

Supplies:
- switch plate
- fabric of your choice
- paint brush
- glue or mod podge
- sealer

First you will spread the glue on the front of your switch plate and turn on over and press in the center of the wrong side of the fabric ( I am using a bandana and the print is on both sides)
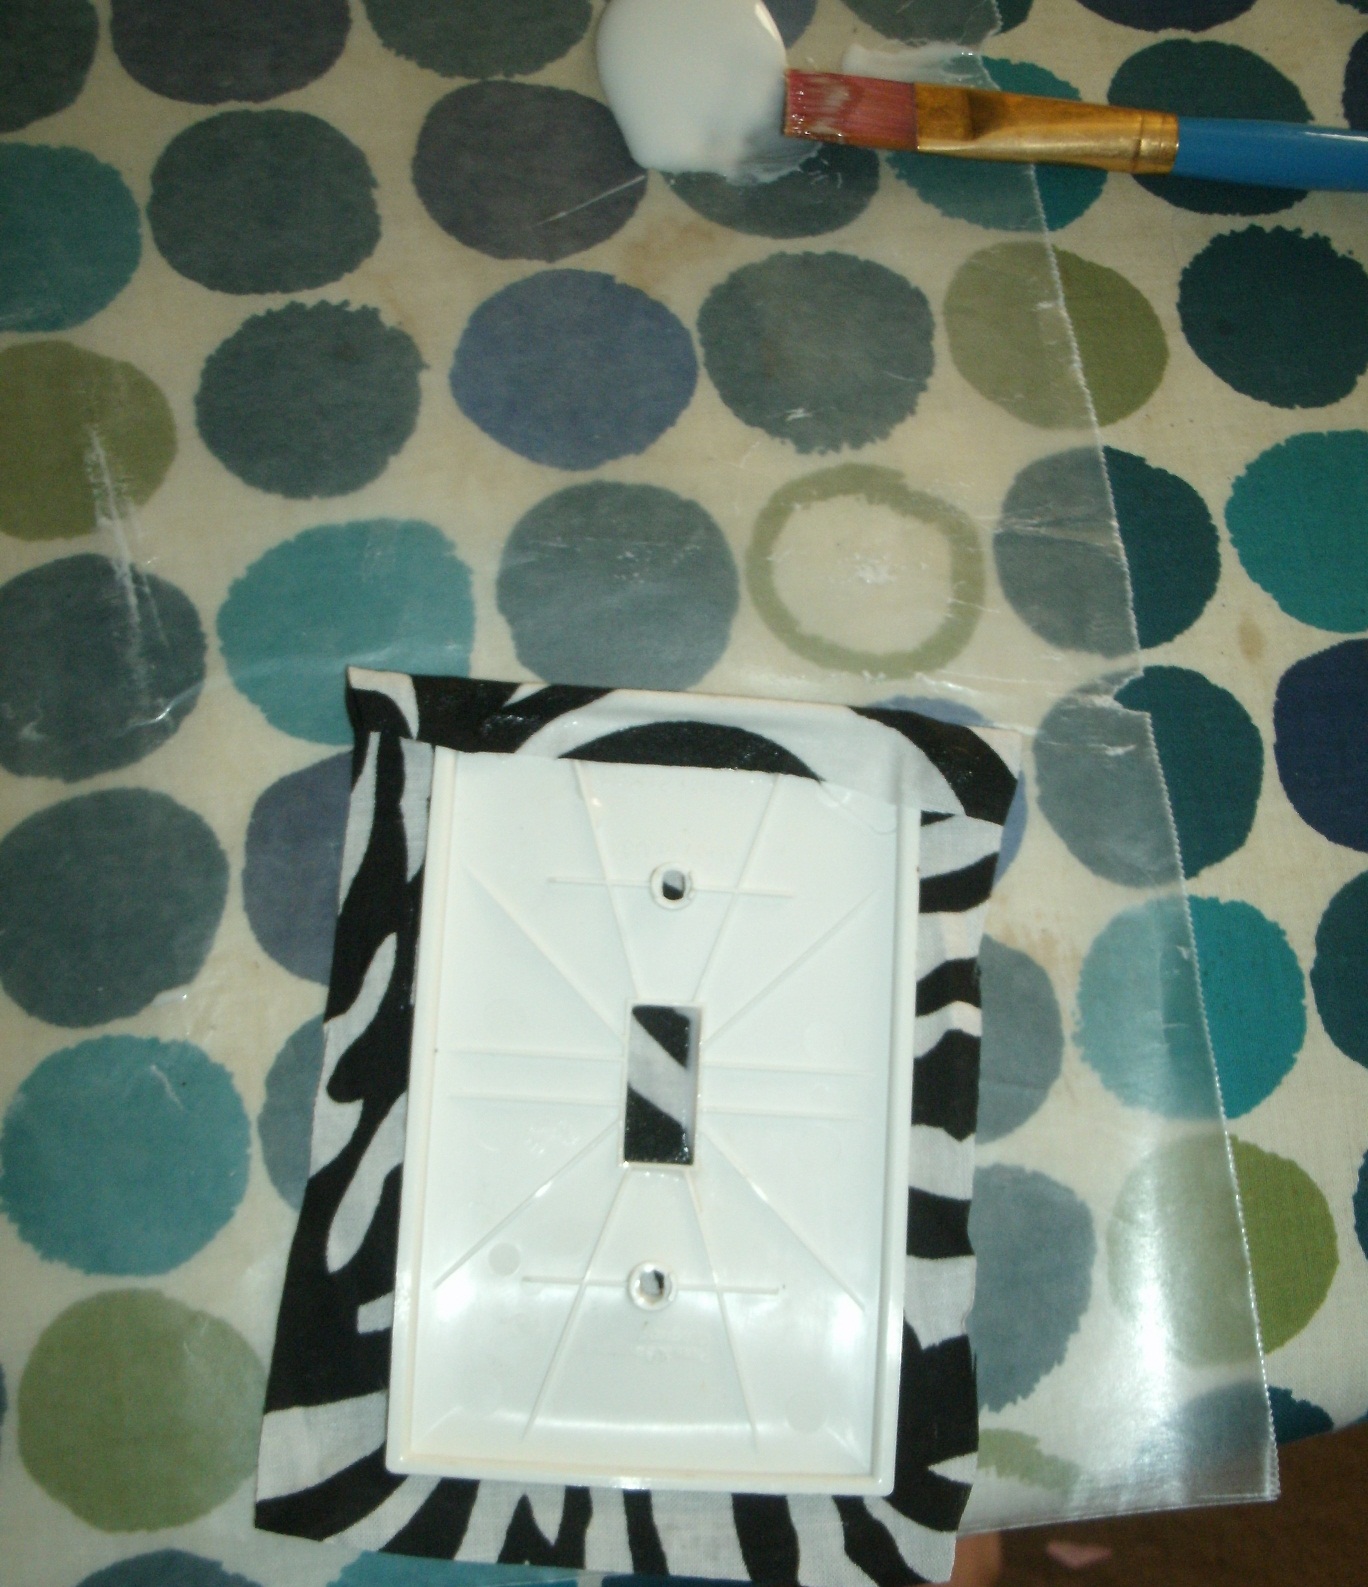
Second you will brush glue along one side of the plate and fold your fabric over.

Continue this step for all four sides, applying more glue if needed to keep edges down.
Forth, you will make an X cut where the switch goes through and then fold the fabric back and glue in the same way as you did on the edges. I use my tiny embroidery scissors to make this cut but you can also use a craft knife.

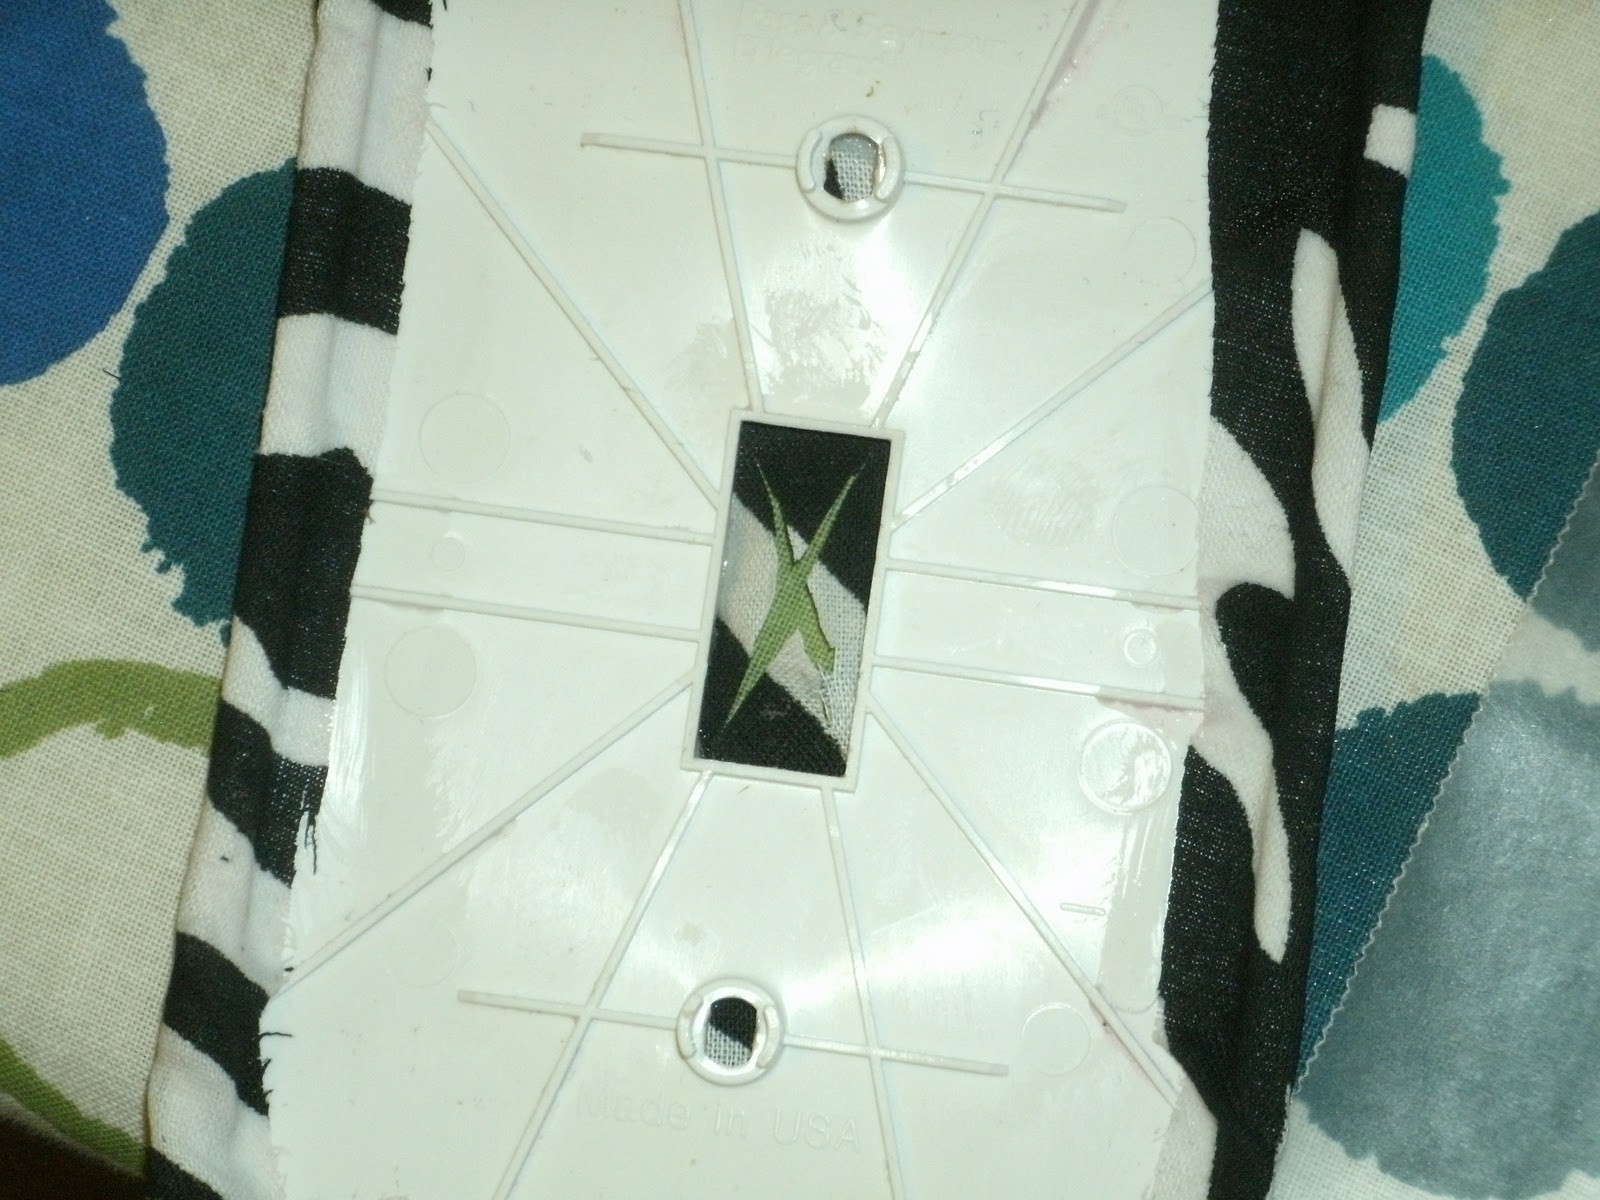
One its dry you will flip it over and puncture two holes where the screws go. You don't have to cut the entire tiny circle, if you just puncture it the screw does the rest when you install it.
Last step is to cover your switch plate with sealer. I used two coats,
you can use as many as you would like but I wouldn't recommend less than
two.

Ta Da! Instant pop of color to match any rooms decor.
FYI this can also be done using scrapbook paper following the same steps.
I hope you enjoyed it, have a great crafty weekend!!!
No comments:
Post a Comment