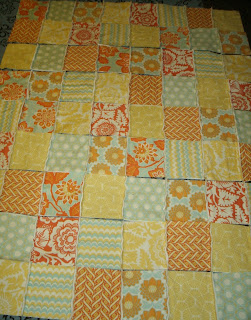
I fell in love with Joel Dewberry's Heirloom fabric collection the moment I saw it. So I just had to make something with it. This is my step by step of my new 'Texas Style' rag quilt. I am calling it a Texas style because it's just plain hot here and we don't have much need for big thick heavy blankets very often at all. For instance today is January 20th, it's snowing in a lot of the US today...here it's 75 degrees! So while most rag quilts have several layers of cotton, flannel and evening batting in some, this Texas version has two. It's very simple and comes out beautifully. Perfect to snuggle up with on the couch to fight that cold chill...from the air conditioner!
First I started out with 8 fat quarters from the collection. I got mine from www.sistersandquilters.etsy.com they have great prices and I always receive my fabric quickly!
From the 8 fat quarters I can get 72 six inch squares. You will also need to cut the same number of squares from your flannel material for the second layer.
(You also have the option to go with more than 2 layers on your rag quilt. You may want to have a coordinating print for the back. In that case you would sandwich the flannel between the to cotton layers with the prints facing outward on both sides. )
Once you have all your squares cut you will need to sew across each square to attach your layers together. I made a diagonal stitch from one corner to another just to tack the pieces together
Now you have all your squares ready to go. I prefer to layout my fabrics so I know for sure I won't have any doubles (the same fabric block next to each other). Once I know the order I am going to put the fabric in I can start sewing the squares together. My 72 squares layout in 9 rows of 8 squares.
To get the rag effect you will be sewing the squares with the backs together so your seam is on the front of your blanket. I sew each row first, laying the finished row back in it's place in my layout.
Now that all the rows are sewn you will need to sew each row together.
To do this you will want to line up your seams. Be sure to lay the seams opposite directions for easier sewing. I pin mine down to insure they lay right while the machine goes over them.
Once it's all sewn together run a seam around the outside edge of the entire blanket so you will be able to rag the outer edges as well.
Now the whole blanket is sewn together!!! For the final and most tedious step is to snip ALL the seams to create the ragged effect.
I try to snip about every half an inch. I used my sewing scissors (Gingher brand) but they do have scissors made for doing rag quilts that I am going to look into buying as your hand does start to ache half way through.
All done! I love it too. The final size comes out to about 41X45". If you are making this to sale or as a gift you may want to run it through the wash once to help the edges rag a bit more and it also gets read of all the stray strings.
I hope you enjoyed this tutorial check back often as I will be posting new quilts I make.


