Showing posts with label tutorial. Show all posts

Tuesday, January 31, 2012

Two Cute Pillows

Still trying to get everything done by Saturday for my sister in laws wedding presents. I finally completed two cute pillows last night. 

The fist one is a ruffle pillow, this is my first ruffle pillow I ever made and
I think it came out pretty cute. 
What do you think?


The second is a small throw pillow for their bed (they are doing the master in leopard). I got this idea from  Maureen Cracknell Handmade blog for a quilted heart pillow.


I hope she likes them!

Friday, January 27, 2012

Fun to do Friday

 If you read my last tutorial you know my sister in-law is getting married and I was wanting to make some things that match their decor they registered for their first place. The last tutorial was  personalized wall art , today I am going to show you how to dress up a boring light switch cover to add a little pop to any room.

 Supplies: 
  • switch plate
  • fabric of your choice
  • paint brush
  • glue or mod podge
  • sealer

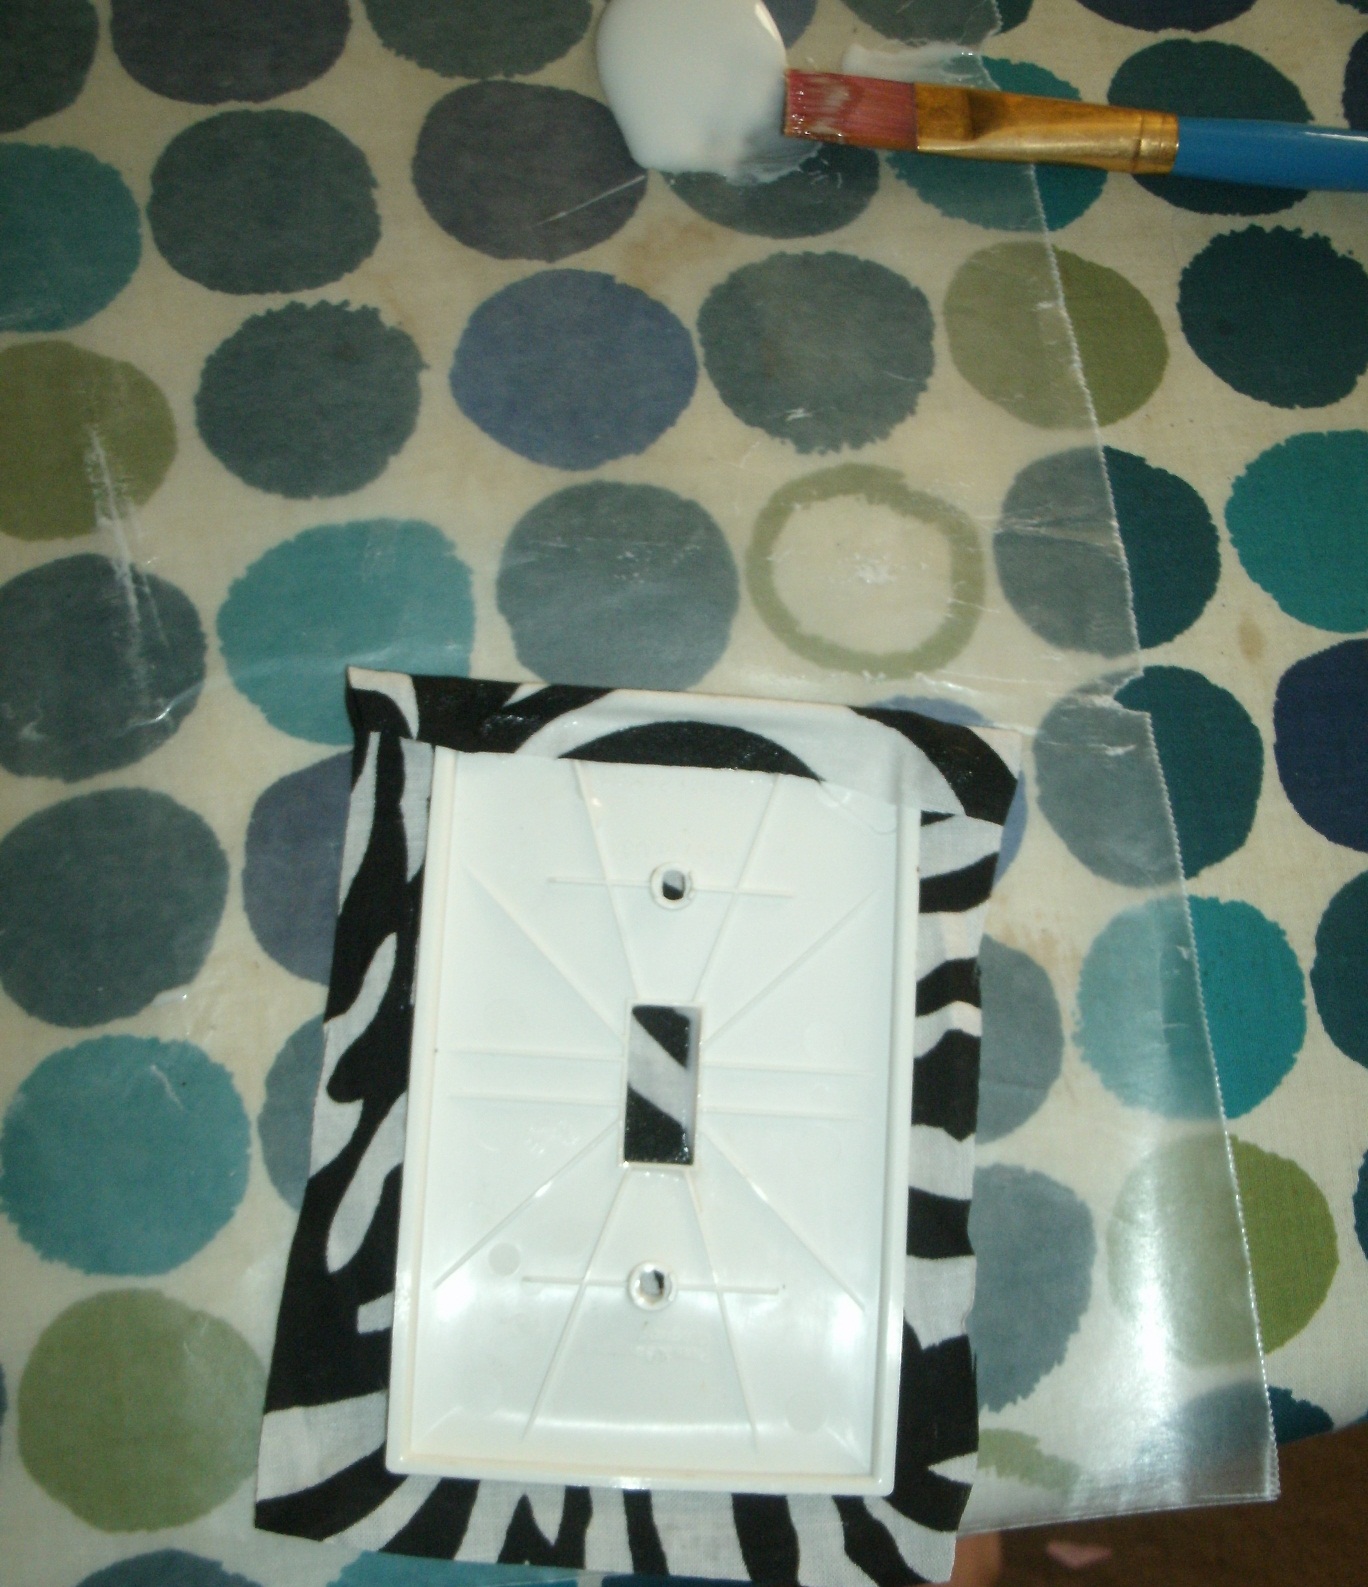
First you will spread the glue on the front of your switch plate and turn on over and press in the center of  the wrong side of the fabric ( I am using a bandana and the print is on both sides)

Second you will brush glue along one side of the plate and fold your fabric over.

Continue this step for all four sides, applying more glue if needed to keep edges down.


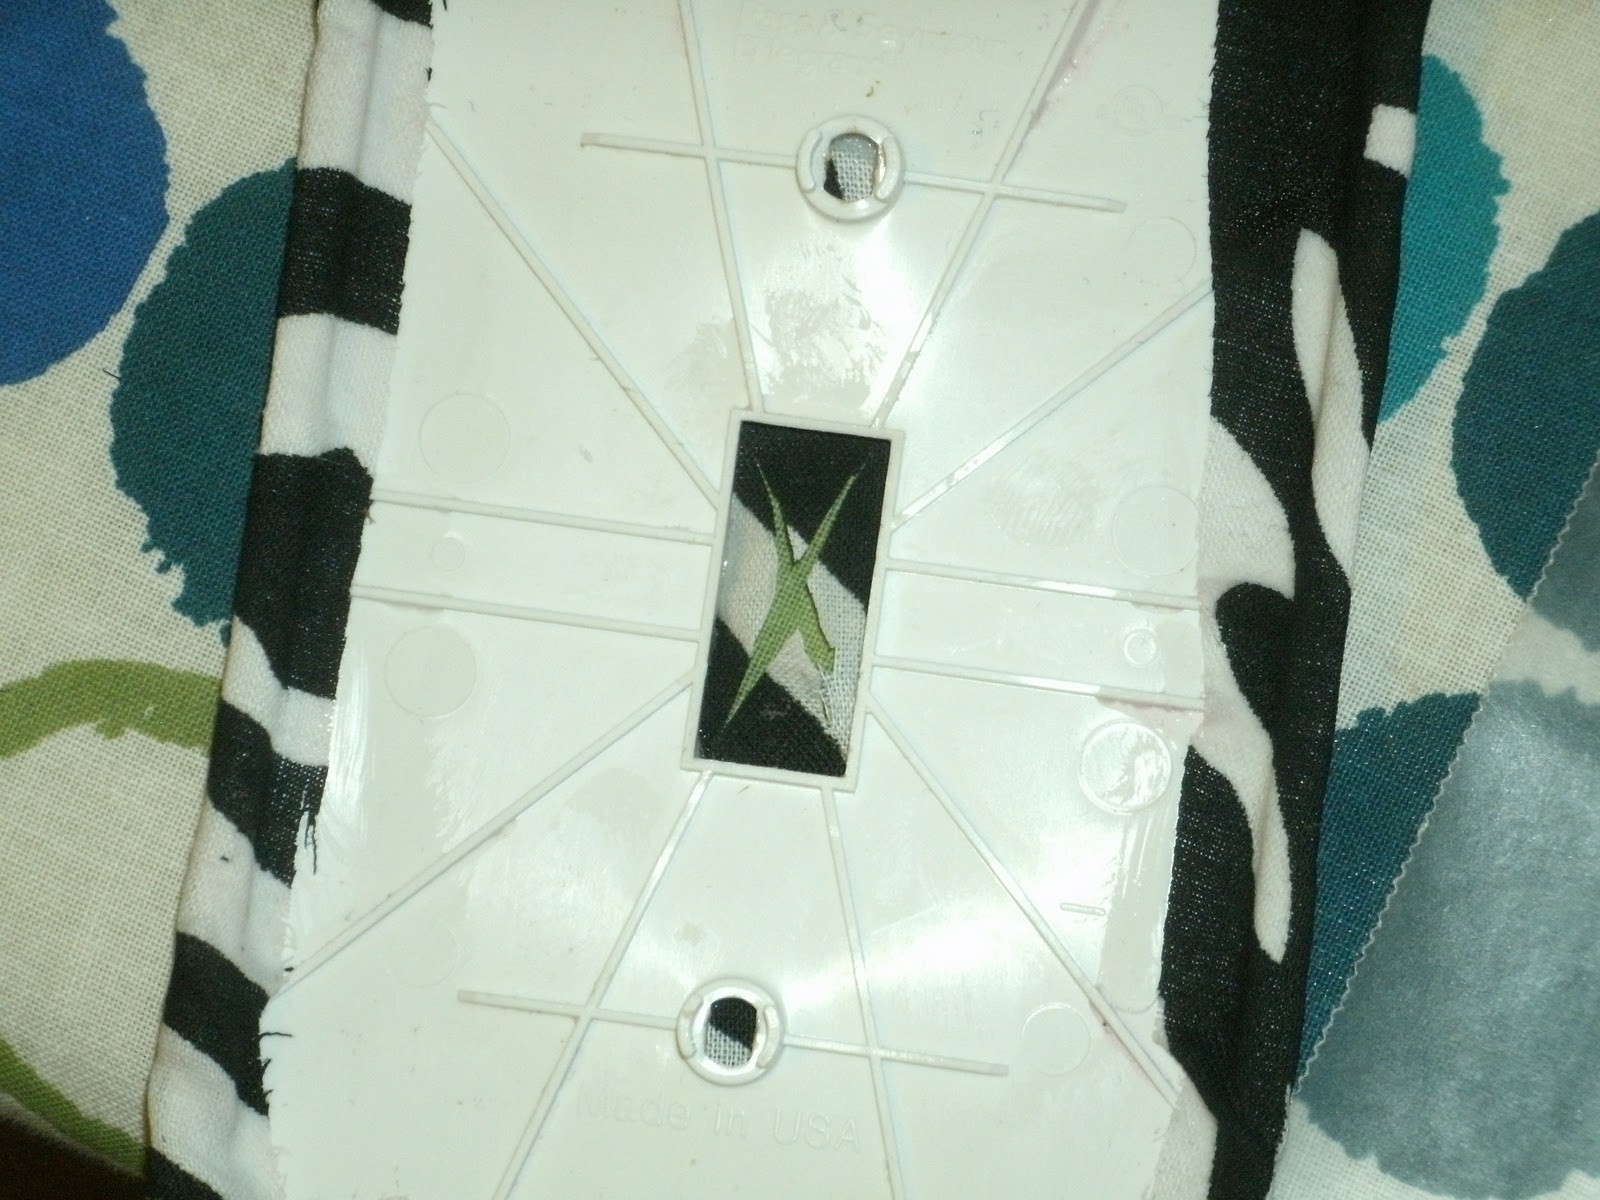
Forth, you will make an X cut where the switch goes through and then fold the fabric back and glue in the same way as you did on the edges. I use my tiny embroidery scissors to make this cut but you can also use a craft knife.

One its dry you will flip it over and puncture two holes where the screws go. You don't have to cut the entire tiny circle, if you just puncture it the screw does the rest when you install it.
Last step is to cover your switch plate with sealer. I used two coats, you can use as many as you would like but I wouldn't recommend less than two.

Ta Da! Instant pop of color to match any rooms decor. 
FYI this can also be done using scrapbook paper following the same steps. 

I hope you enjoyed it, have a great crafty weekend!!!

Thursday, January 26, 2012

Personalized Wall Art Tutorial

Since I can't sew anymore today I decided to be productive in other crafts. My sister in law is getting married and they are moving into their first place next month, she is doing her bathroom in zebra so I thought I would make her some things for her new house.


So here are the no-sew tutorials for this cute personalized piece of art.


First you will need
  • your desired background fabric
  • fabric for your applique
  • design for your applique cut from paper or cardstock
  • heat n bond
  • iron
  • scissors
  • picture frame
  • cardboard piece from inside picture frame or cut your own to size

First Step: iron your Heat N Bond to the back of your applique fabric (directions are on the package)


Second Step: Take your design template (mine is the letter V for their last name) and trace it onto your applique fabric. I just found a font I liked, enlarged it to the size I wanted, printed and cut it out.


Third Step: Cut our your design and peel off backing paper of Heat N Bond


Forth Step: Iron on your applique to your background fabric, be sure to flip the fabric over and iron the back to ensure a good application


Fifth Step: center your design on the cardboard piece, flip it over, wrap the edges around the back and hot glue them down


Now put it in the frame and hang it up


 Ta Da!